
After this process, now it’s time for the audio board to return to its original place. Time to plug her back.
The final touch is to assembly the power supply board and the new capacitors. It will take some time – 15 minutes probably?
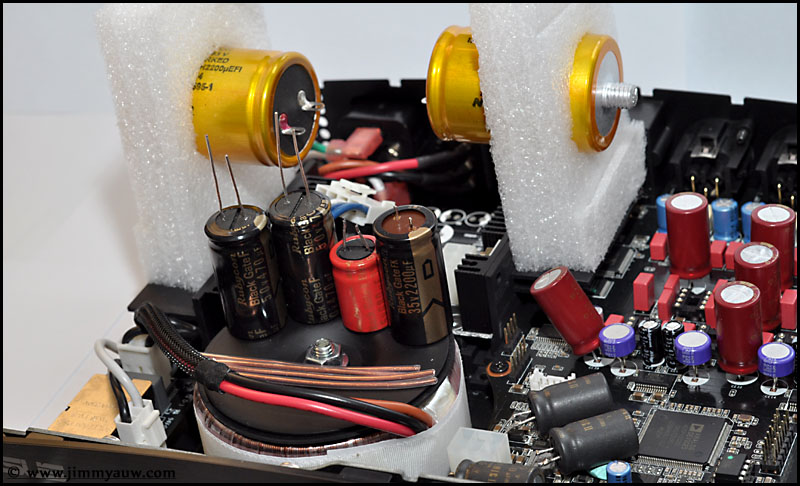
For some capacitors, I need to jumper them (space is the main concern). So I use UP-OCC wire with Teflon insulation (around 18 AWG) to connect them. And off course, a bit of creativity to mount them. Note the yellow Jensen electrolytic capacitors and their new ‘DIY’ mounting kit 😉 Can’t see any better for sure!
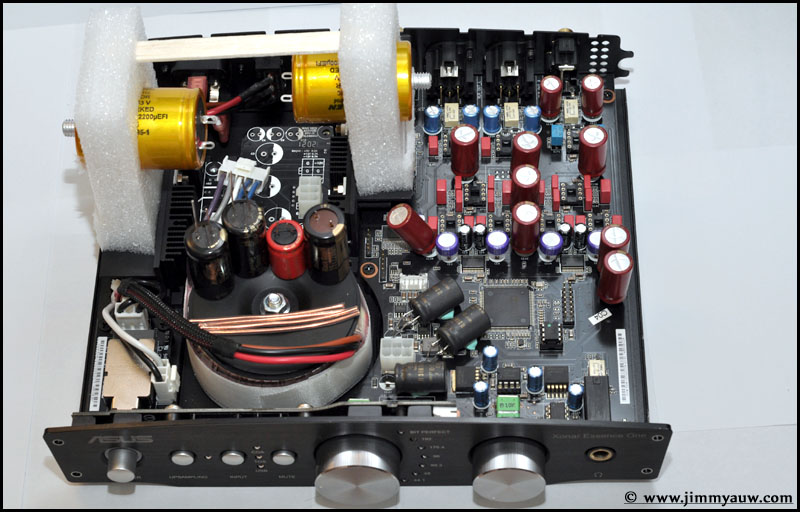
The final appearance of the card. I don’t think I can use the original cover then. How about a new chassis? You bet!
Also you can see a ‘bamboo’ bridge to connect both ‘walls’ which holds the Jensen. Again, not the best approach but it just works!


Agus
May 12, 2013 06:14Pagi ko,
Wah, ini baru namanya oprek total.. gabusnya bener2 menarik perhatian 😀
Drpd nanggung, sekalian upgrade ke pcm1794A aja, pinoutnya mirip seingat saya 🙂
Salam:)
Auw Jimmy
May 12, 2013 09:29Hi Bro Agus,
Skill nya belum nyampe buat nyopotin IC nya 🙂
Thanks.
Agus
May 12, 2013 10:16Pagi Ko,
Bawa ke tukang HP ko, kalo yg 1795 setingkat sama 1798 kelihatannya, cuman yg 1795 bit rate sama sampling frek lebih tinggi… setahu saya loh.. 😀
Kemarin sempet upgrade dr 1798 ke 1794 lumayan beda jauh suaranya menurut kuping saya yang masih baru masuk sekolah… wkwkwk 😀
Salam 🙂
Agus
May 12, 2013 10:19Pagi Ko,
Mau tanya, itu BG yg 2200uF kok basenya warna coklat lastik yah? Ori?
Salam 🙂
Didiet
May 12, 2013 10:55Kalau cara barbar, kaki IC di potong pakai cutter, sisa kaki jadi lebih gampang membersihkannya.
Auw Jimmy
May 12, 2013 11:17Siang Bro,
Bukannya FK memang basenya dari dulu juga cokelat? Saya lebih seneng F sih, tapi ya ga punya size yg cocok. Jadinya FK juga lumayan lah.
Thanks.
Auw Jimmy
May 12, 2013 11:20Hi Pak Didiet,
Cara barbarnya agak beresiko di multi layer PCB. Saya cuman berani pake cara itu kalo PCB max double layer.
Anyway, sebenarnya ga sulit koq melepas IC segitu pake hot air. Dulu waktu masih suka mainan motherboard kayanya sampe 32 pin yang 4sisi masih berani dijabanin hehehe.
Thanks.
Auw Jimmy
May 12, 2013 11:31Siang Bro,
Device apa nih yang diupgrade dari 1798 ke 1794? Diam2 mainannya gawat nih. Pastinya bukan device sembarangan.
Saya belum cek untuk pastikan 32bit di 1795nya terpakai atau tidak. Karena itu cukup riskan diganti sampai kita tahu pemrosesan apa yg dilakukan di dalam Xonar ini secara dia ada pakai SHARC juga.
Thanks.
Agus
May 12, 2013 23:26Malem Ko,
Yang diupgrade DAC kelas pemula 😀
Salam 🙂
Auw Jimmy
May 13, 2013 00:04Ya ya percaya…
Didiet
May 13, 2013 11:41Pak Agus, pemula saja preampnya pakai TVC. Apalagi DAC pemulanya …
Auw Jimmy
May 13, 2013 11:53Sepakat……..
Agus
May 13, 2013 12:41Siang,
Pak Didiet ikut2an jadi provokator dah.. wkwkwk 😀
Beneran…. DAC pemula… beli d Ebay usd 70 tapi akhirnya yg dipakai cuman bagian IC receiver ama IC DAC aja… analog ama psu nya bikin PCB baru lg…. maklum ga ada budget buat beli yg kelas Xonar…. wkwkwk 😀
Salam 🙂
Gaston
August 5, 2013 00:11Hello,
Very much interested in this, except that I have a Xonar Essence STX.
To bad you dont write about the sonic improvement and that the replies I can not read..
Can you comment on the sound,please?
Thank you!
Gaston
Auw Jimmy
August 5, 2013 18:09Hi Gaston,
I believe the impression is available on other post.
Thanks.